5 Steps Towards the Quintessential SA Braai
This September, celebrate South Africans’ vibrant braai culture with a delicious barbeque drenched in heritage flavours.
There are few aspects of South African heritage that are more celebrated across the diverse cultures, than our love of a good braai. We even have a National Braai Day! Anyone looking for a true taste of what it means to be a local, would do well to fire up the grill and invite friends over for some smoke and sizzle. Keen to try to perfect your technique?
1. Choose Your Fire or Fuel
To get the best out of your braai, you have to use the best for your braai.
-
Wood: Try using any hardwood, e.g. kameeldoring, swarthaak, or sekel. For those of us in the Western Cape, dry rooikrans will do. Hardwoods generally burn hotter for longer, giving you more time on the braai.
- Charcoal and Briquettes: Although briquettes are convenient, and certain recipes call for them, we prefer charcoal, which burns hotter, cleaner, and longer than briquettes, with none of the resin smell.

2. Choose Your Grill Method
When it comes to the braai, you have a couple of grill methods at your disposal: an open wood fire, charcoal (in a Weber, for example) or a gas braai. The latter two options are great for when you want a quick meal and complete control over the temperature at all times.
Here are some tips for the braai:
- The placement (height) of the grill will depend on your cut of meat. Thick cuts (like lamb neck and shoulder or chicken) will need a longer time over the fire, so you’ll place them higher (to prevent burning). Something like lamb chops does well over a medium-height grill; the same goes for sosaties. Steak and boerewors, which need very little time over the flames, can go low over the fire.
- For the juiciest boerewors, hang it to dry while you prepare the braai, and braai it on the hottest coals possible. This will take about four minutes, and you will have the perfect, juicy inside and a crisp casing that snaps upon biting.
- It’s a good idea to make a secondary, smaller fire on the side of the braai, both for conviviality and for flexibility, so you have more coals at your disposal should a potjie or piece of meat require more time on the grill.
- Don’t fall into the trap of turning your meat too often as you risk losing some of the juices. And always, always let red meat cuts rest for 5-10 minutes after removing them from the fire.

3. Choose Your Tools
Although the braai is traditionally not a formal gathering with lots of rules, there is a widespread appreciation for using the right equipment. So it’s worth investing in quality tools for safety and efficiency. These include:
- A good pair of braai tongs to help with safe food handling. Not only will it protect you from burns, but it also ensures better treatment of meat cuts. The prongs of a fork, for example, will prick the casing of sausages and cause all that lovely, flavourful fat to drip into the fire.
- Invest in a quality stainless steel grid, and be sure to clean it before each firing.
- A thick-based, cast-iron skillet is one of the most versatile pieces of equipment. It’s great for the fire-cooking of vegetables and even burgers, while giving the best crust on large cuts of beef.

4. Choose Your Flavour Profiles
One of the most important decisions you can make regarding the braai is the flavour profile of your main course.
The surest way to come out on top flavour-wise is to pre-season your meat. Both dry and wet marinating are low-effort techniques, as they impart better flavour than a quick spicing before you grill, and they also tenderise the meat.
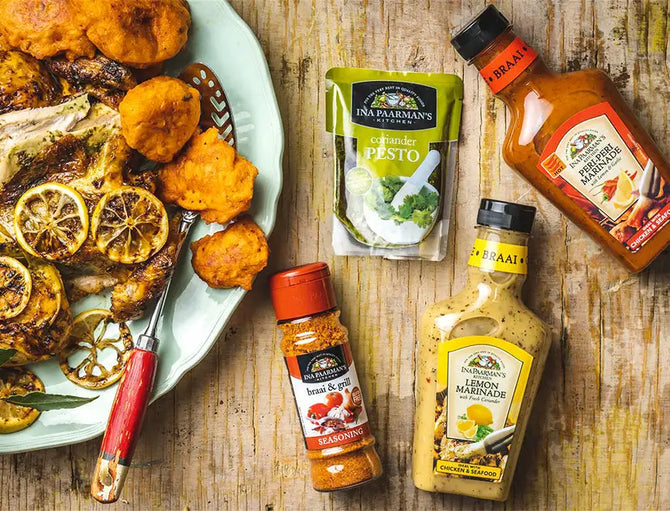
The great thing is, there’s so much variety to play with. Chicken, for instance, loves all things peri-peri and lemon, so opt for Ina Paarman’s Lemon or Peri-Peri Marinades. Pork, on the other hand, really comes into its own with a sweet marinade, which means it will go down a charm with Ina Paarman’s Sticky Plum & Soy Marinade. If you have lamb and steak in mind, you can’t go wrong with a traditional barbeque flavour profile like Ina Paarman’s Barbeque Marinade. Finally, remember to marinate your protein for at least an hour, but overnight is ideal.

5. Choose Your Sides
There’s a simple rule when it comes to a true South African braai: you can’t have too many sides!
We’re talking salads (potato, curry bean, and pasta, not to mention coleslaw). We’re talking starches: homemade pap (or polenta) with chakalaka, charcoal-roasted potatoes, whole mielies grilled on the braai, and barbequed veggie sosaties. And we’re talking breads: braaibroodjies are essential in the Cape, of course, but we’ll also never say no to a well-made roosterkoek or a fragrant garlic loaf.
Although there’s a lot of tradition involved with the preparation of sides, this doesn’t mean you can’t have fun with new flavour combinations or ingredients. Liven up the standard braaibroodjie, for example, with a dose of garlic flavour, courtesy of Ina Paarman’s Garlic Pepper Seasoning. Make a melt-in-the-mouth spiced butter for your grilled corn by mixing a healthy dash of Ina Paarman’s Chilli & Garlic Seasoning into salted butter. Take your veggie sosaties to a new level by drizzling them with Ina Paarman’s Mushroom or Sun-Dried Tomato Pesto. Baste your hasselback sweet potatoes with Ina Paarman’s Smokey Chipotle Barbeque Marinade and serve with crumbled feta, diced red onion and fresh coriander. The sky’s the limit.

Now you only need to decide who to invite! While it’s true that South Africans have a fondness for a quick, mid-week braai, the deeper spirit of the country’s braai culture really comes forth in a nice, big gathering, be it with family or friends. The more the merrier – so send out those invites, and light that fire.
Remember: wholesome eating starts at home. For more inspiration, view our wide range of delectable recipes made with Ina Paarman products – crafted from fresh, well-chosen ingredients that are loaded with nutrients and flavour.


